> ## Documentation Index
> Fetch the complete documentation index at: https://help.opus.pro/llms.txt
> Use this file to discover all available pages before exploring further.
# Adjust Layout
## Adjust Layout
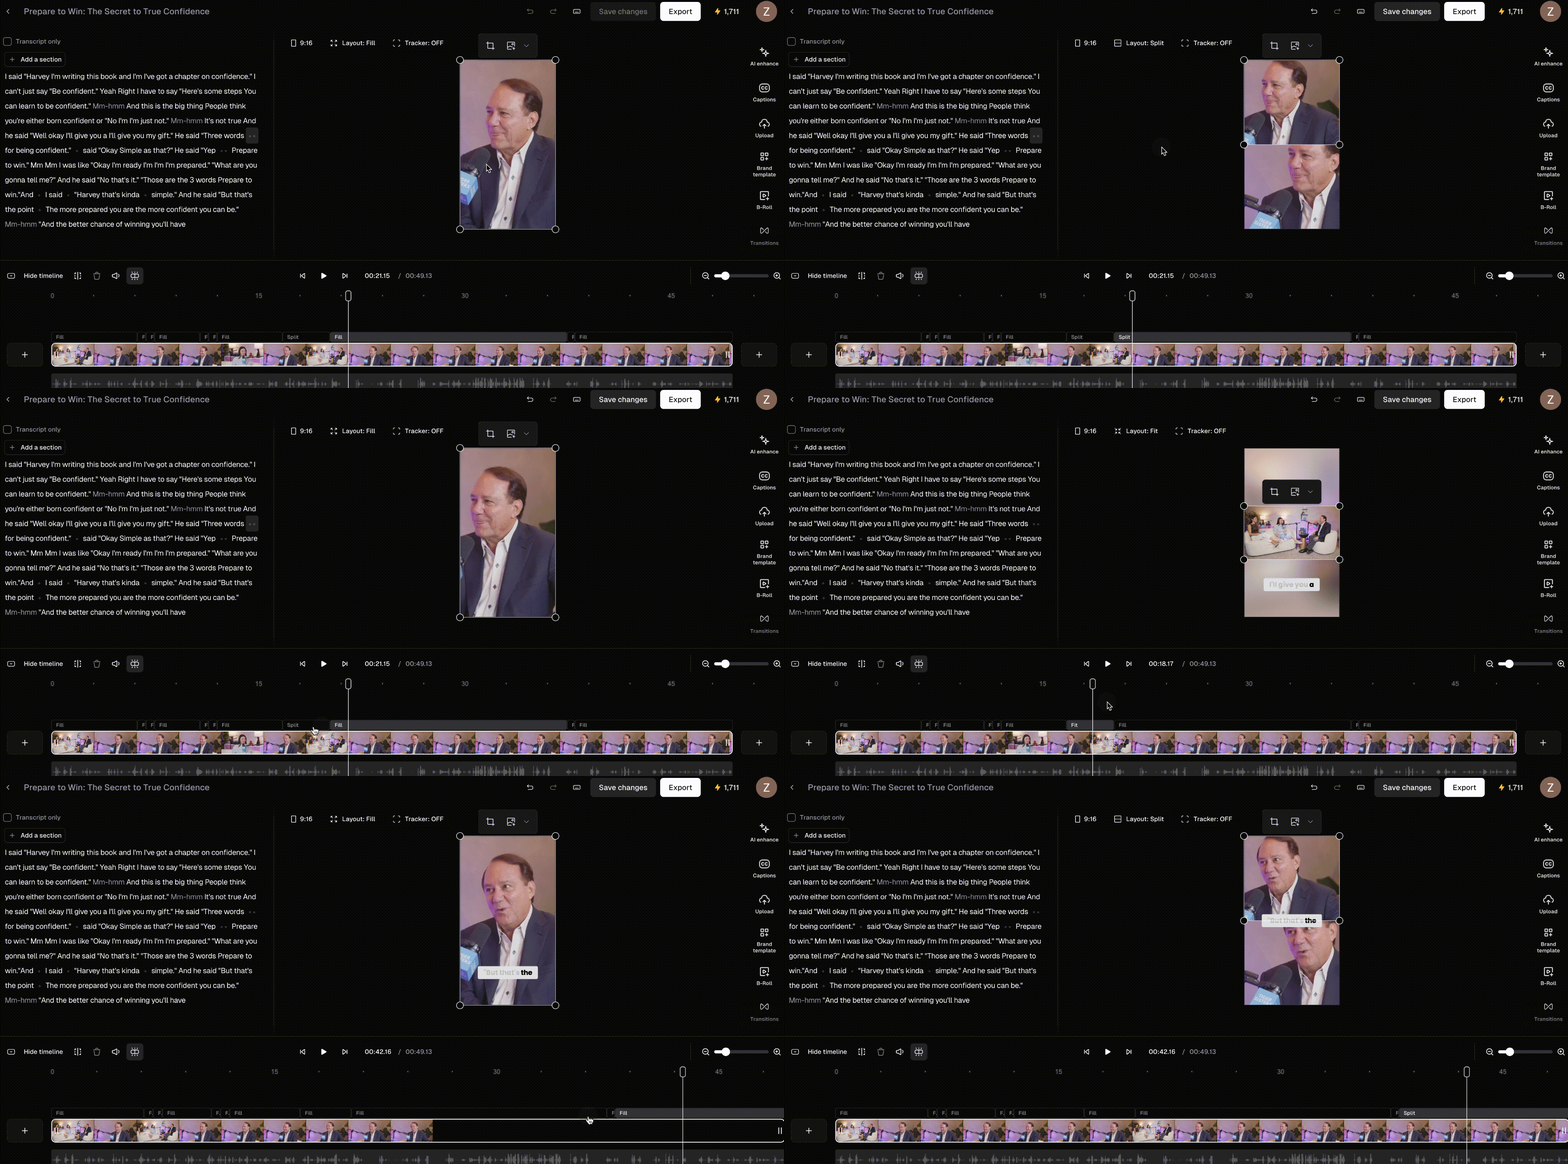
To change a clip's layout, click **Layout** at the top and select one. Your layout is applied wherever it fits.
### Change the layout of a segment
To relayout a single scene, select it from the timeline, then right-click the canvas or open the **Layout** dropdown and choose a layout.
### Change the layout of a B-roll segment
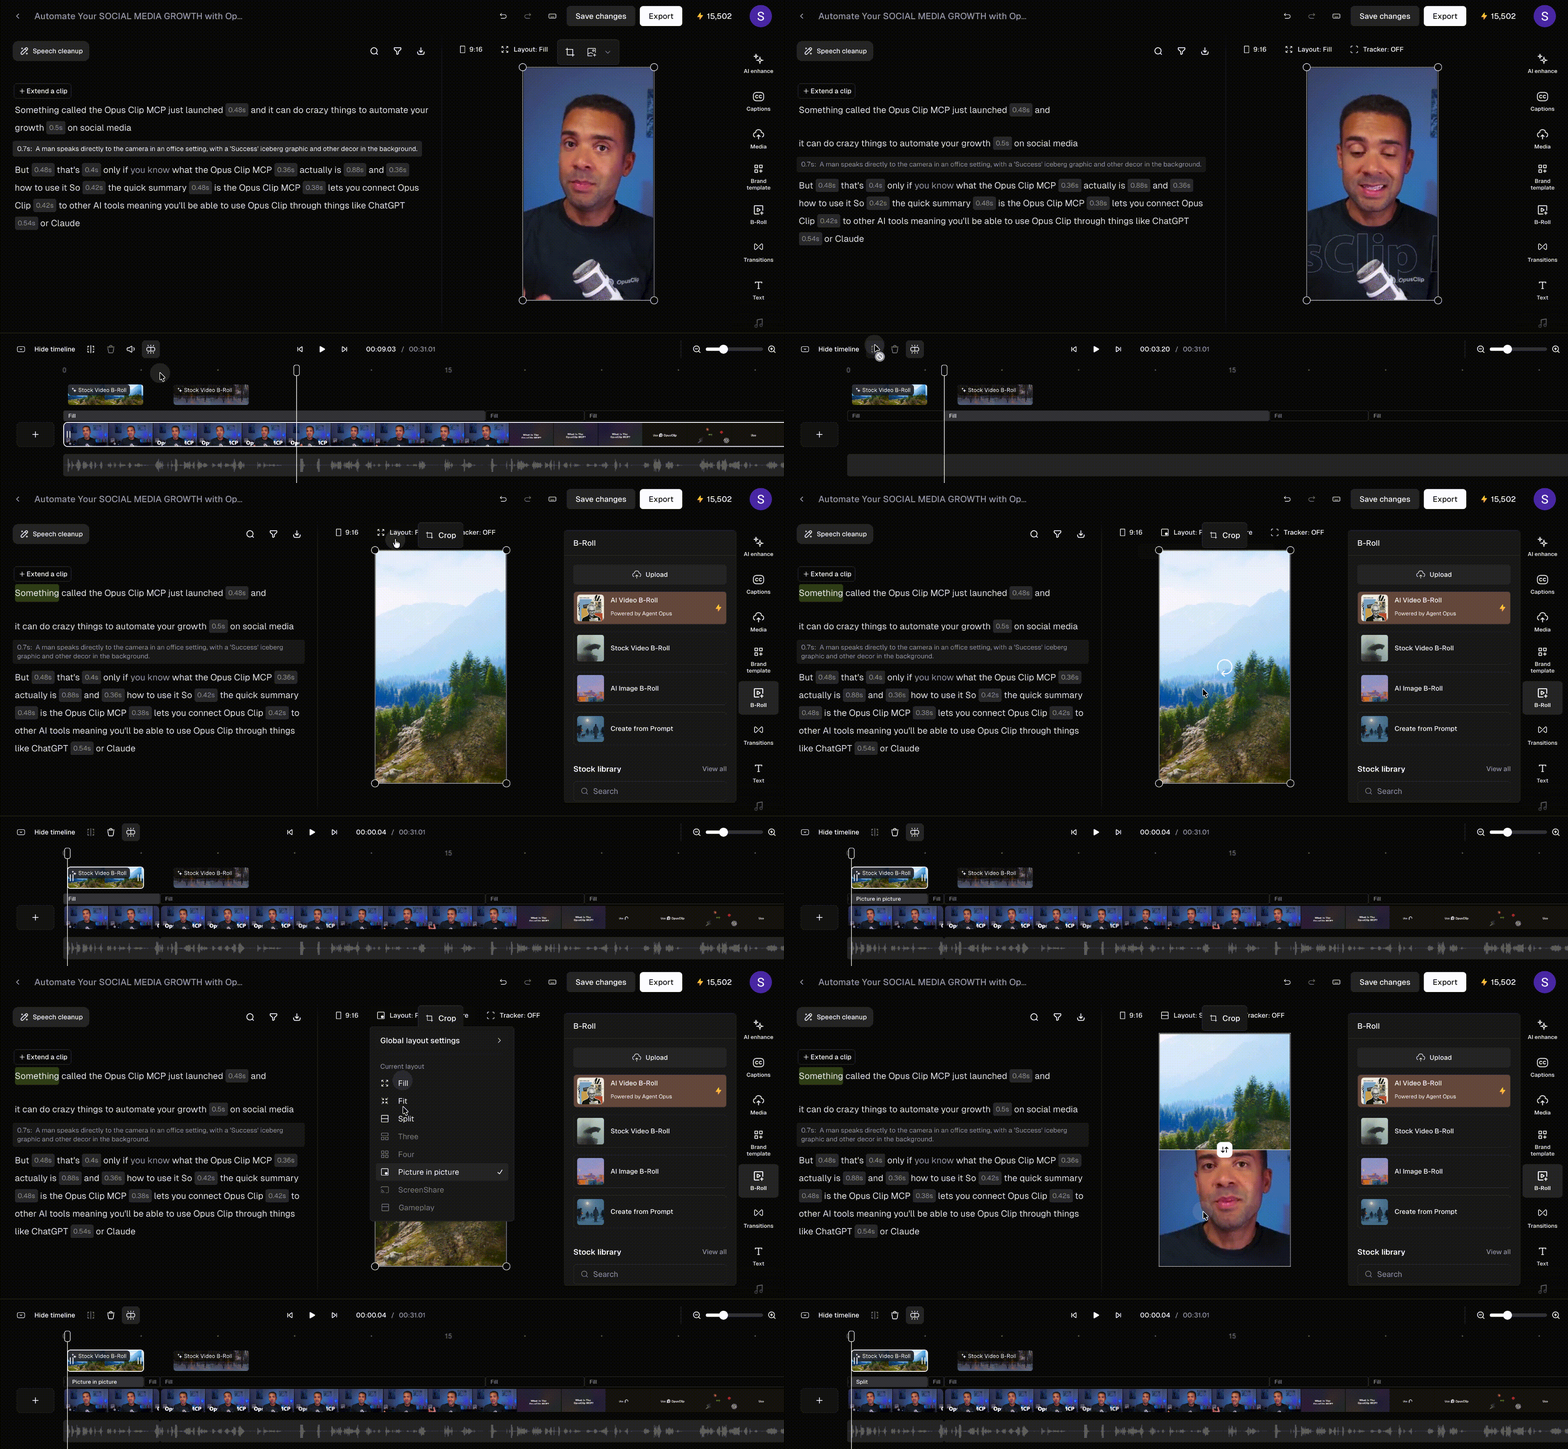
Segments with B-roll unlock extra framing options. Select the B-roll clip on the timeline, then right-click the canvas or open the **Layout** dropdown to pick a framing:
* **Fill** (default) fills the screen
* **Picture-in-Picture (PIP)** keeps your speaker in a small window over the B-roll
* **Split** stacks the speaker and B-roll top and bottom (not supported for 16:9)
#### One B-roll per segment for Picture-in-Picture
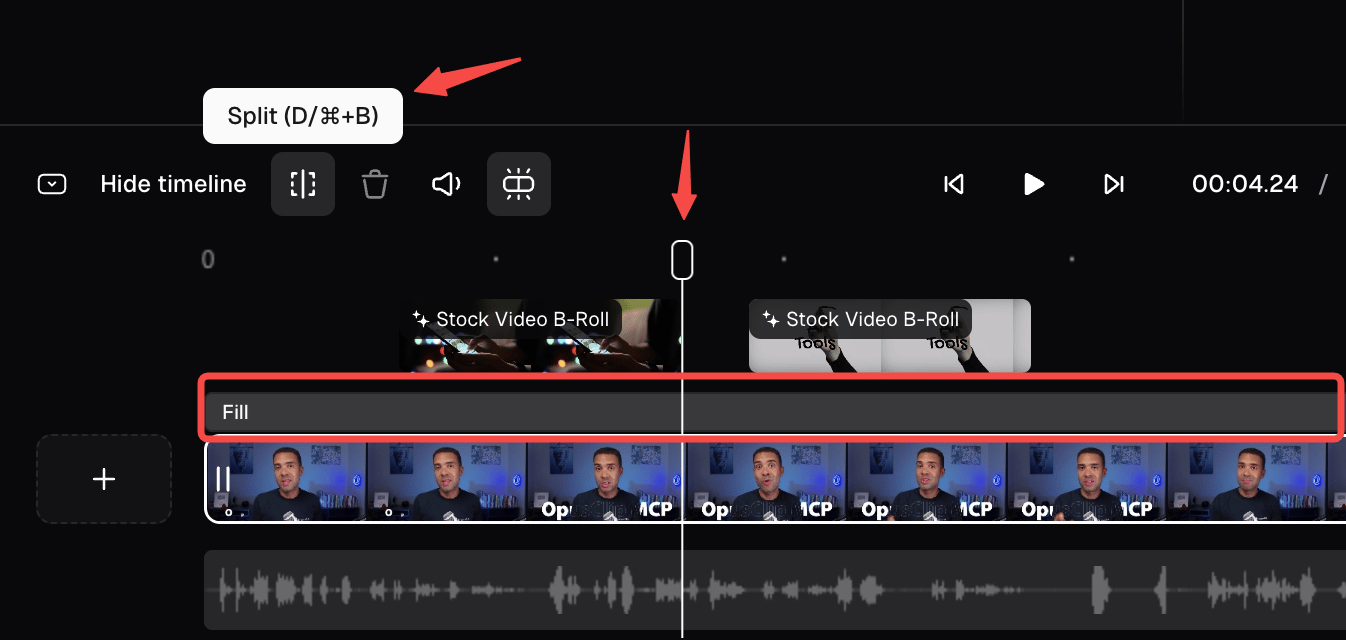
Picture-in-Picture only applies to **one B-roll at a time**. If a segment contains two B-rolls, split it into separate segments on the timeline first — then apply Picture-in-Picture to each segment individually.
## Set default layout
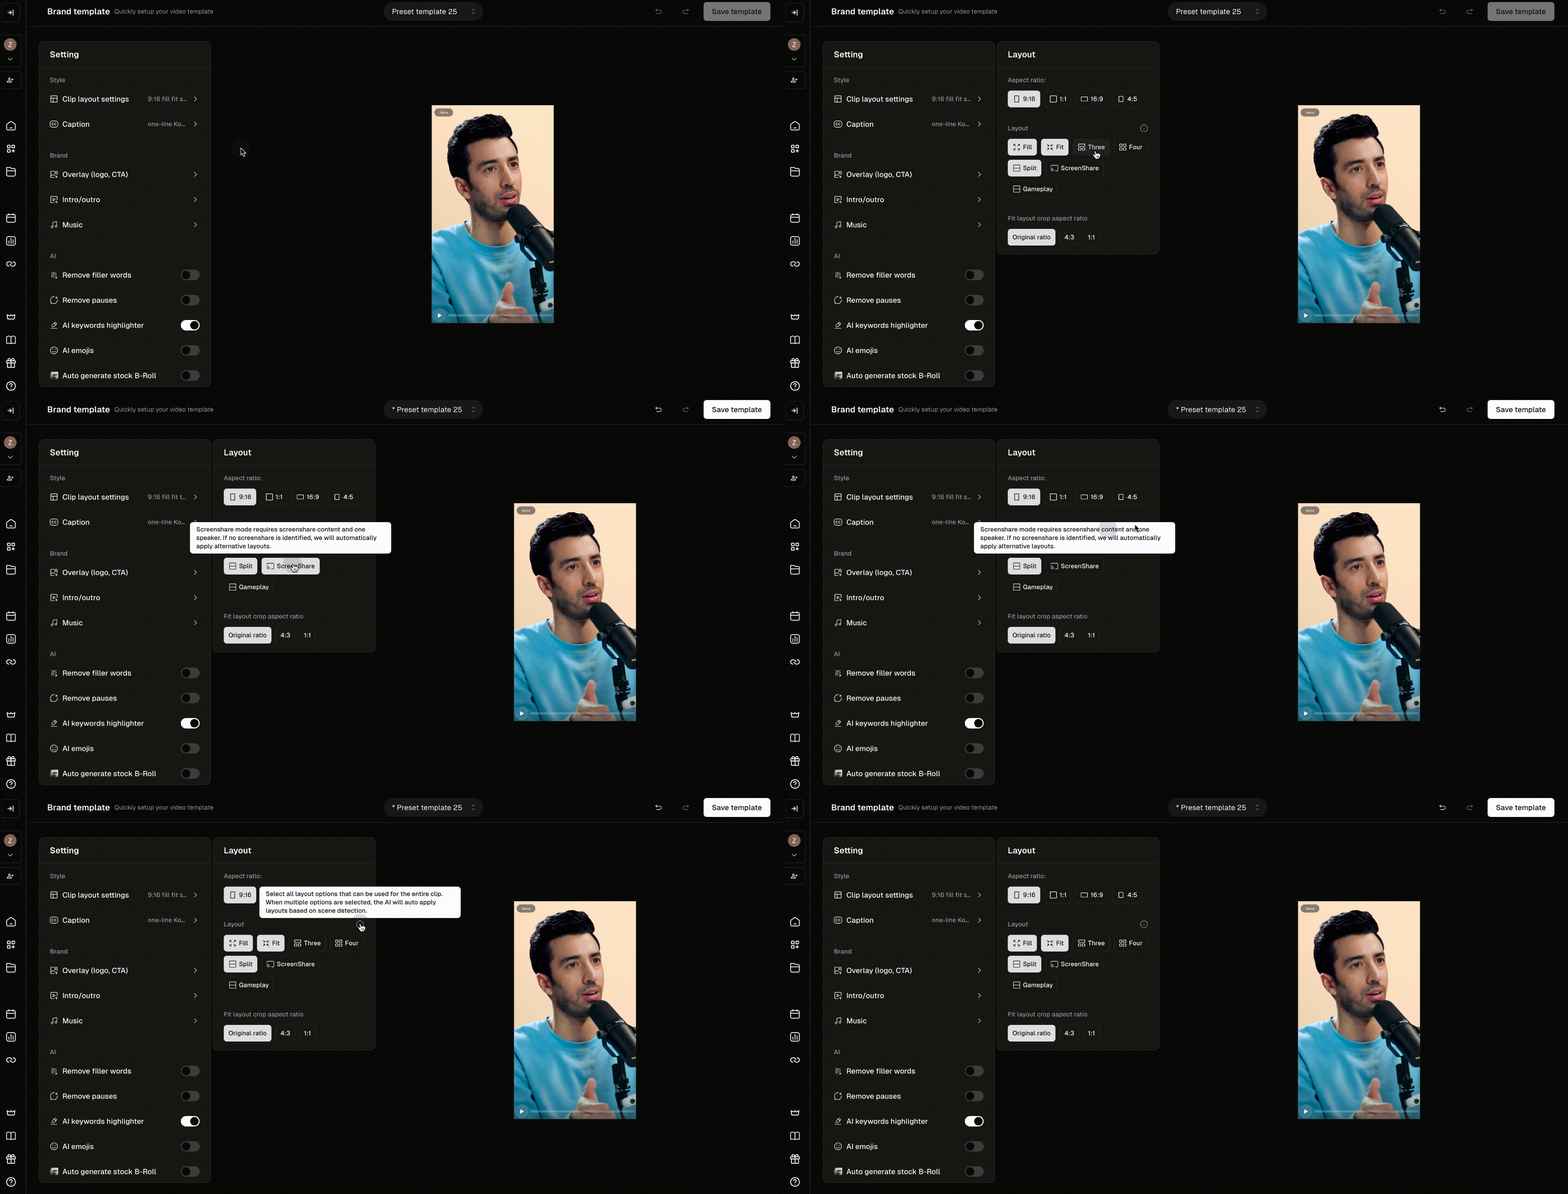
You can customize your layout preferences using the brand template and apply them to your entire project before submitting it. To get started, navigate to the brand template tab and create a new template.
This documentation is built and hosted on [Mintlify](https://mintlify.com), a developer documentation platform.